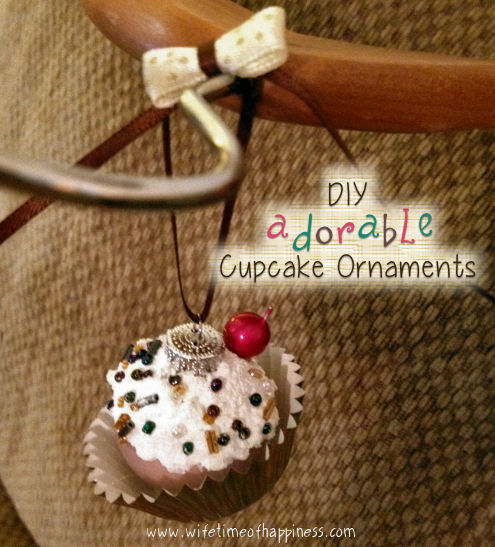
I absolutely loved these DIY Cupcake Ornaments!
They turned out so super cute, I just had to share!
 Now, there are many variations of these all over the internet, so you can always get creative and do things your own way.
If you like how mine turned out…Read on to see how I did it 🙂
Materials Needed
Ribbons
Hot Glue
Snow Tex
Paint Brush
Mini Foil Cups
Clear Glitter Paint
Small Ziplock Bag
Miniature Multi-Colored Beads or Pearls
Sprigs of tiny Holly Berries (I used bright pink berries)
Mini Bulb Ornaments (I used 1.4") in pastel colors (Purchased from Michaels)
Instructions
Take a few spoonfuls of snow tex and put into your ziplock bag.
Snip the end of the bag to create a funnel.
Pipe Snow Tex around the bulb, about half way down.
Sprinkle on some beads and pearls.
Gently push down the beads so they dry nicely on the icing.
– Allow Snow Tex to dry completely –
Once the Snow Tex has dried, paint on the glitter and allow to dry.
Once Glitter Paint has dried, clip off a tiny berry from your sprig, leaving a bit of a stem.
Hot glue the sprig onto the top of the cupcake, off to the side a bit.
Next, take a foil cup and add some hot glue to the bottom.
Set your ornament in on a bit of an angle.
On the bottom of the cup, press down gently so it will not dry bumpy. You may want to do this on a hard surface, rather than using your hand.

These little ornaments make a perfect 'drop-by' Holiday gift and are also deliciously cute for Valentines Day!
Good-Luck and I hope you enjoyed this tutorial!
![]()
I have listed the needed materials below, for your online shopping convenience.
The mini bulb ornaments and ribbon used were both purchased at Michael's 🙂
Shopping from the United States?
Shopping from Canada?

Comments are closed.